
How to use your iPad as an Audio FX Unit

iConnectivity has been at the forefront of iOS integration for some years now. We’re proud to have given musicians the ability to integrate iOS devices such as the iPad into their computer setups. Whether it’s using an iPad as a MIDI controller for show control or streaming the audio from a synth based app such as Animoog, iConnectivity interfaces can handle the job.
Did you know, however, that you can also use your iPad as a real-time audio effects processor? There are some great apps out there which turn any iOS device into a virtual effects unit.
Fancy a virtual recreation of the famous Moog ladder filter? The Moog Filtatron has you covered. Looking to add some filth to your guitar or synth signal? Then an amplifier simulation like BIAS can give you all the crunch and grind you could ever desire.
Configuring your iPad as an external FX processor
iConnectivity user Anders Steele recently posted on the iConnectivity forum his experience of turning his iPad into a virtual tape delay unit. Anders used Numerical Audio’s RE-1 Virtual Tape Machine app, in conjunction with his iConnectivity iConnectAUDIO4+

In this tutorial we’re going to be configuring the iPad just like a traditional outboard FX processor. This means we need to configure an FX send from our mixer (in this case a virtual DAW mixer in ProTools) as well as a separate FX return so that we can blend the delay back in with the original sources.
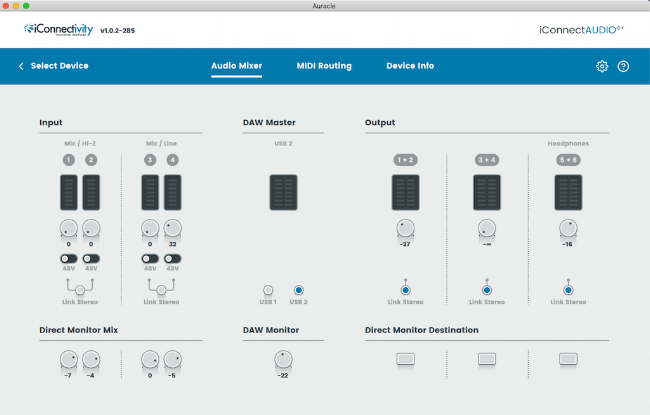
The example shown is for ProTools, but is very much the same process for most DAWs. In our case we have a MacBook running Pro Tools connected to the USB2 port on the AUDIO4+, and we have the iPad connected to the USB1 port on the AUDIO4+. If you are also using USB2 port for your DAW, make sure that you have your DAW Master set to monitor the sound from that port in Auracle so you can hear what you are doing.
Now go to the Pro Tools I/O setup, create a new pair of outputs and label them as iPad; you could label it anything, but choose something easy to remember that makes sense to you.

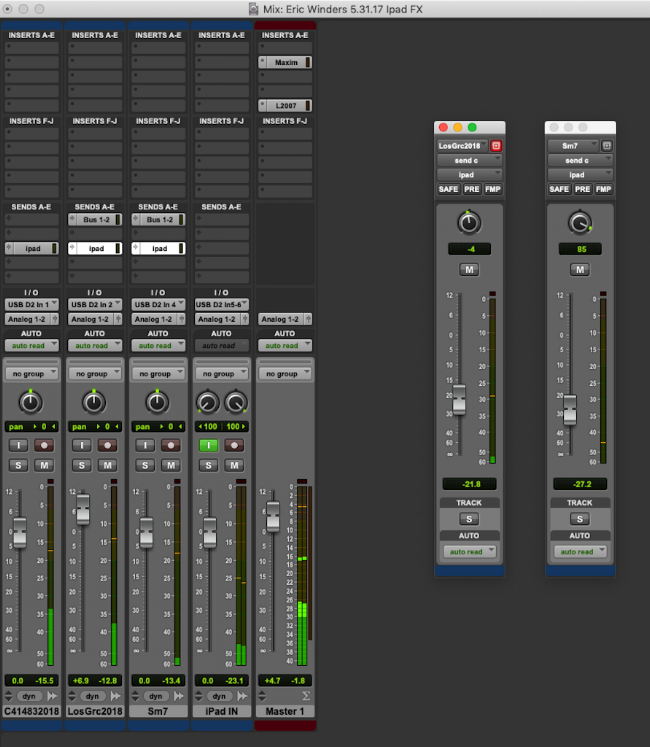
Now we have an audio path created to send our audio out to the iPad. In this screenshot you can see that we have created 3 tracks, each of which can be sent to the iPad via this virtual FX Send - you can send as many tracks as you want to be effected!

We now have to create an FX Return path so that we can hear the effected sound coming back from the iPad. In order to do this we’re going to create another stereo channel, which in this instance will be using inputs 5/6 on the AUDIO4+, as seen above.
When you click the send button in the Pro Tools mixer labeled iPad, you will see the faders on the right pop up. These faders allow you to control how much overall signal you want to send out to the effects processor running on your iPad.
All we need to do now is pull up the return fader and Pro Tools, and voila! Your iOS device is now an external effects processor!
